
When a design is double clicked in BuzzXplore it can be converted on-the-fly and opened it into your embroidery software thereby eliminating the need to pre-convert designs. Nevertheless, you may still want to convert your designs to your preferred format for easier access from other embroidery software or to change thread colors. BuzzXplore makes it easy to accurately convert embroidery designs and can convert thousands of designs at a time, all within minutes!
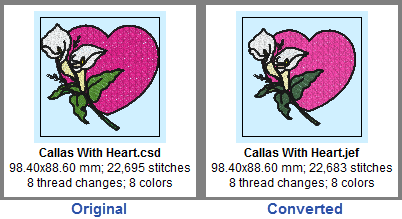
BuzzXplore offers many powerful features that change what it displayed in the contents pane. You can choose to show only some file types, include (or exclude) the contents of zip archive folders and even display the contents of multiple folders at the same time. In this simplified tutorial, it is assumed that your contents pane already displays a folder of designs which you would to convert and that your view settings are to your liking. For a more in depth tutorial that covers all of the filter and view options, please refer to the BuzzXplore program help which can be accessed directly from the Help > Contents menu. The tutorial is located under the help topic Tutorial - Start Here > Managing Your Design Collection > 12. Convert Design Formats
You may convert from multiple file types at the same time or limit your conversion to only a few preferred formats using the file filter. Don't worry if you are including designs of the target file type or file types that cannot be converted – these files will simply be ignored.
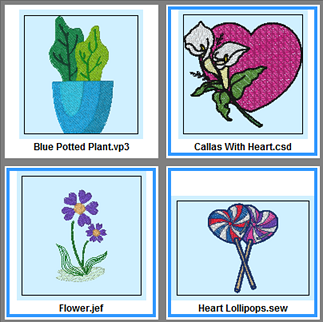
If you plan on converting the entire contents of a folder and/or its subfolders, you don't need to individually select them. However, if you only want to convert a few designs, you'll need to select them in the contents pane. To select one design, just click on it. To add to your selection, hold down the Ctrl key and click on additional designs.
PRO Tip: Some embroidery formats may contain more information than others. For example, the PES format includes embedded color information and DST formats do not. There may also be hoop issues when converting that you will want to consider. Therefore, if you want only the best formats converted to your preferred format, use the File Filter to hide the less preferred choices. You can later display all embroidery file types with the setting to skip existing files to convert any designs that were missed on the first pass.
Use the BuzzTools > Convert Embroidery Designs command to launch the wizard. On the dialog, make these key choices:
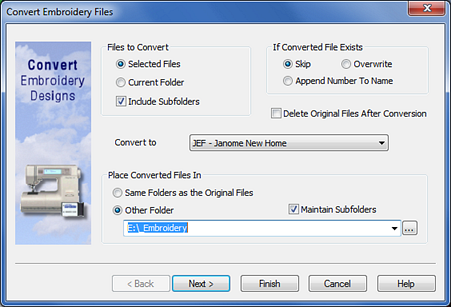
The first time you convert to your preferred format, you'll probably want to review the format specific conversion options and hoops. In this case, click Next. If you have run the wizard before and are satisfied with your prior choices, you can click Finish.
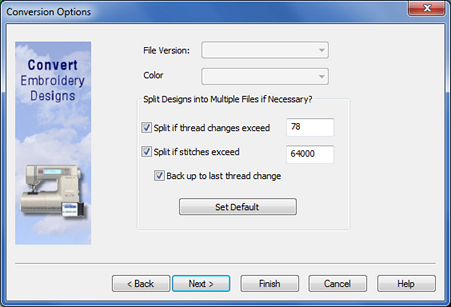
The second conversion dialog allows you to select a specify target file version and controls how your designs are split. Most of the time you will not want to change these settings however, if you have older software you can change the file version if needed. You can even modify when a designs is saved into parts but don't change these unless you are an advanced user and really know what you are doing! Click Next to continue.
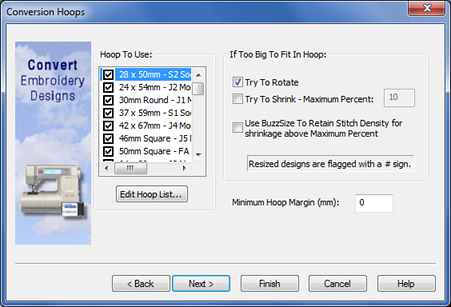
By default, all hoops of the new format are used and designs are rotated during the conversion if needed to fit the new hoop. You can remove hoops you don't have by editing the hoop list. You can also tell BuzzXplore to shrink designs that don't fit but the stitch count of the new design remains the same unless you also have BuzzSize (and select the Use BuzzSize option. Click Next to continue.

The last conversion screen displays the number of files that will be converted along with the options specified. Click Finish to convert your files and to display your updated catalog.
Remember: Your catalog cannot display your converted files if your File Filter is set to exclude them. So if you don't see your files, check your File Filter!